Feeds:
Posts
Comments

I just can’t hack it with WordPress anymore so I moved my blog over to Blogger:

http://kaorumarie.blogspot.com

I first started blogging on Blogger back in 2004 and I’ve just been so used to the format over there. When I decided to start this blog for some reason I used WordPress. Unfortunately, I just couldn’t get used to it. I’ve moved the blog over there and please excuse the formatting in the next week or two while I adjust the old posts.

Sorry to make you work at following me, but I appreciate your readership.

Thanks!

Simplicity 2698 skirt pattern is gradually becoming a favorite of mine and I don’t even normally like wearing skirts.

Simplicity Skirt 2698 - E - Front

That front center seam just kills me…..

I have the fit down and this time I barely even looked at the construction instructions. Actually, I didn’t look at the Simplicity instructions at all and only peeked at the Sewaholic Cresent Skirt instructions when it got time to attach the zipper to the waistband facing. I wrote down some notes on the instructions sheet the last time I made a skirt and it was such a time saver since I knew exactly what I was talking about (don’t you love it when you can read your own notes months later??).

 This was my first time making version E. I think I never made it before because the skirt front consists of two pieces with a seam down the center and I never wanted a center front seam. But since I dislike version J so much (too much of a tulip shape, not enough drape) and I was too lazy to make version I (ugh, those pleats are so cute, but take so long) I decided version E may be ok.
Simplicity Skirt 2698 - E - zipper

I no longer fear invisible zippers!

I had been contemplating buying the Sewaholic Hollyburn skirt pattern, but since I’m so averse to wearing skirts I didn’t want to buy another skirt pattern and not like the outcome. The more I looked at version E of the Simplicity 2698 pattern, the more I realized it resembled the Holllyburn skirt, especially after reading Amanda’s review of her black and white polka dot skirt.  It might seem like my skirt is a total copycat of Amanda’s polka dot skirt, but I swear I had the fabric for several months and I had originally planned on making a skirt with it once I realized it was way too thin for a jacket (specifically the Sewaholic Robson Trench). I will admit that seeing her version definitely gave me the extra bump in motivation to finally de-stash and make a skirt. Besides, the piping on her skirt is absolutely adorable and definitely kicks my skirt to the curb.

I initially thought I could make this skirt in one day. My ability to severely underestimate sewing time pains me! This skirt took WAAAAAAAY longer than I had anticipated. First of all, I think it’s nearly impossible to match center front and back seams of a polka dot print. I tried twice. I failed twice. I tried matching dots along the pocket and failed, again. After wasting so much damn time attempting to match dots at those seams, I didn’t even bother trying to match dots at the side seams or waistband (yoke). I finally had to tell myself to just power through and not care because I was using some cheap cotton/poly blend fabric. I even machine sewed a straight stitch for the hem because at that point I DNGAF.

Oh, and since this fabric was very lightweight I needed a lining, which required a quick stop to my closest fabric shop, International Silks and Woolens, which is THE PERFECT place to go if you know exactly what you want, but you don’t want to waste any time looking for it. They have at least a handful of people on the floor ready to help you. As soon as I walked in a lady came over asked me what I wanted. I told her I needed black lining, nothing too expensive. After selecting some black lining I asked her what interfacing she would recommend for a shirt collar and cuffs (I have a Negroni waiting on the sidelines to be made for my husband). She immediately showed me her preference and then off I went back home. I think I was back home in the amount of time it would have taken me to get to the nearest Joann’s and oh you know how terrible customer service is there and good luck finding someone who knows what they’re talking about.
Simplicity Skirt 2698 - E - Lining

I suppose suffering through sewing in a lining is better than wearing a slip all day.

Anyway, the skirt. I hate working with lining! Oh it’s so terrible! And of course I didn’t remember Gertie’s post, about using tissue paper when cutting slippery fabric, until after I cut out my lining pieces and saw how wonky they all turned out! *CRY* I had only planned on attaching it to the waistband so really it didn’t matter how well it actually matched the skirt pieces (not very well!).
Simplicity Skirt 2698 - E - Full Length Photo!

Apparently my husband doesn’t care for taking photos of me. “I have Jeopardy to watch!”

Overall I’m pretty happy with this skirt. The back is flat and the front has two small pleats. The hem is much wider so there is a bit of flounce to it. I really like full skirts in theory, but I’m always so self conscious wearing them. (I don’t know why. no, I do know why. It’s because I think they make me look even shorter.) But I really like this look; I swoon over every full skirted dress Roisin of ‘But it Can’t be from Dolly Clackett‘ makes. She definitely knows how to work that style and I need to get used to it because I much prefer a fuller knee-lengthed skirt over a mini, pencil, or maxi skirt.

I definitely want to make this version again with a couple tweaks: reduce the waistband (yoke) height by half, eliminate front pleats, and use a solid color or a print that is easier to use with a front center seam.

Skirt Details
Pattern: Simplicity 2698, version E
Fabric: Black and white polka dot cotton/poly blend from Fabric.com (I would not buy this fabric again; I knew I should have ordered a swatch first.)
Size: Straight 4, but shortened pattern by 4″ and used a 2″ hem
Notions: One 9-inch black invisible zipper (7-inches would have been fine)

And because you made it this far, here is a photo of my Bailey. He jumped in the closet.

Bailey is in the closet

I hadn’t taken a photo all day. I was cleaning up some sewing stuff, preparing to head off to bed soon after. I was about to take another iPhone photo when I somehow convinced myself to dust off my dslr camera and external flash. Sweet Bailey was lounging in his chair and I couldn’t resist taking a photo of my darling sleeping cat.

Day 147/365 - Sleeping Bailey

Sleeping Bailey

I only took four shots (one with the incorrect light setting) and it took hardly any time.

Note to self: Use your real camera more often.

The iPhone is perfect for capturing in the moment happenings, like this one*

Day 117/365

Gimme my damn beer!

but it can’t beat a dslr camera in picture quality, especially indoors in crappy lighting.

*Before all the animal abuse groups start contacting me about being a terrible cat guardian, no alcohol was actually consumed by Bailey. He was just licking the top of the bottle.

I’ve taken a bunch of photos the past several years that get transferred from my camera to my computer and then I forget about them. I figure why not post them for random people to stumble upon every now and then. I mean, I intended for this blog to be about photography, sewing, and calligraphy, so I might as well share some photos….First up in the ‘Photo Dump’ Series is Ottawa, Canada.

**Please excuse the poor quality of some of these photos, especially the ones taken at night. I only brought my old point and shoot digital camera, which doesn’t work very well in low light situations.**

I went to Ottawa, Canada in Winter 2012 (soon after I started this blog) for a work thing. My first visit to Canada was some time before 2010, when I went to Montreal for several days with a group of friends. I loved Montreal! So I was excited to head to Ottawa even though there wasn’t much I knew about the city. The only things I knew about Ottawa were (1) their hockey team is the Ottawa Senators, and (2) there is a canal that freezes in the winter and I SO BADLY WANTED TO GO SKATING ON THE CANAL! I first learned about the canal years ago while watching some hockey special on TV. It looked so cool and I have always wanted to go ever since, but really, why would I go to Ottawa?

Enter: a project in Ottawa that I happened to be able to work on.

I actually worked on this project for over a year before I was sorta required to go to Ottawa. My boss joked early on in the project that if I didn’t do well, then they would send me to Ottawa in the dead of winter as punishment. Little did he know I was secretly hoping I could go when it was frozen over so I could go ice skating on the canal!!! Well, the stars aligned and in the Winter of 2012 I was beckoned to Ottawa for a week. Holy Moly, it was FREEZING! FREEZING!!! Although, all of my coworkers (that I finally met in person for the first time) kept reminding me that they were having a “warm” winter. I was severely unprepared and under-dressed for my week in Ottawa. ‘What do you mean thin fleece gloves won’t be warm enough? Isn’t a peacoat a winter coat?’ Hey, at least I had my LA Kings tocque to keep my ears and head warm!

Our last day of meetings ended early and while most of the people booked it out of there for their designated weekend at home, I had the rest of the evening to myself since I wasn’t flying home til the following morning, thanks to the lack of direct flights between LAX and YOW. As I left the office I decided it wasn’t “too” cold at the moment so I went back to the hotel to put on as many layers as I possibly could (including two pairs of knee high socks) and hightailed it to the nearest skate rental.

A coworker warned me that the canal ice is very different from rink ice and oh boy, he wasn’t kidding. I looked like an amateur skater out there. With the ice shredded to sh*t, the sun slowly disappearing, and the temperature rapidly dropping, I slooowwwwly made my way down the canal just trying not to eat it.

Bridge over the Canal

Bridge over Rideau Canal

I made it as far as I could before I realized I was losing feeling in my fingers. The trek back to the skate rental kiosk was a bit painful since my legs were so cold and I couldn’t really feel my feet. I kept telling myself that this was an opportunity of a lifetime for a SoCal girl! I didn’t have any regrets being in so much discomfort because it was totally worth it. Skating on a frozen canal in the dark? LOVED IT! (I should add that my  mom would not have approved of my solo skating adventure in the dark.)

Rideau Canal at Night - 1

Home Stretch of Rideau Canal

I quickly got a beavertail (another recommendation from a coworker), ran through the ice sculpture exhibit (part of Winterlude, an annual  Winter festival….I don’t even know…), and made a pitstop in a coffee shop to warm up a bit before heading back to the hotel to regain feeling in my extremities.

Winterlude Ice Sculpture - 1

Ice Sculpture at Winterlude

The next morning I walked around the City for as long as I could stand it (not very long) and got more photos of the Canal:

Rideau Canal in Daylight - 2

Rideau Canal with Chateau Laurier hotel in the background

As well as the Parliament building:

Parliament Building

Parliament Building….are you kidding me?! Could it be any fancier??

My next trip to Ottawa several weeks later wasn’t nearly as exciting. The newness had worn off. The “warm” winter rendered the canal closed for skating. I made sure to stay indoors for as long as possible.

If you’re interested, additional photos from this trip can be found on my Flickr account, including a selfie of me on the Canal; I had to get proof that I was actually on the Canal despite how unflattering or terrible the photo is. If you ever have reason to visit Ottawa, I highly recommend going for one day during the winter so you can experience skating on the Canal! Especially if you’re like me and have never skated outdoors. It’s amazing!

OMG WHEN IS THIS SHOWING COMING TO THE STATES?!!?

I started reading Tilly’s blog “Tilly and the Buttons” earlier this year and found out about ‘The Great British Sewing Bee‘ (don’t click the link unless you want spoilers!) through her blog (because she was a contestant, how cool is that!?). I remember thinking, “oh man, I wish I could watch this show”. Then the other week Gertie mentioned watching the show on YouTube, so I checked it out over the weekend and was totally hooked. COMPLETELY HOOKED! Except there are only FOUR episodes and at the time only 3 had aired.

I missed the start of the recent Project Runway season so I haven’t been watching. However, based on some reviews I have read recently it sounds like this season ain’t so good. I had been getting a bit bothered at the amount of blatant advertising and the contestants seem to get wackier and less relate-able with each season so perhaps it’s a good thing I missed this season.

Which brings me back to TGBSB. It’s adorable! In case you haven’t seen it, here’s a quick rundown.

There are only 2 judges on this show: Patrick and some other lady (I can’t remember her name). Patrick is the younger and hotter version of  Tim Gunn (sorry, Tim!) and he has a British accent {swoon!} Both judges are so sweet and their criticism is constructive without coming off as catty. The host is a lady (damn, can’t remember her name either….can you tell who I am focused on the most???) and I can’t quite tell if she is familiar with sewing or if she asks simple questions for the benefit of a novice viewer. Regardless, she is too nice as well. She’s not a Tim Gunn replacement because instead of giving advice she’ll tell the contestants how she feels, mainly about how much she’s loving something. How nice, right?

(source: http://www.digitalspy.com)
Lady Judge, Lady Host, and Patrick!

Lady Judge, Lady Host, and Patrick!

In the middle of the episode the show will go into a bit of history about sewing, which is quite informative. For instance, in one episode it was explained how patterns came into existence. Near the end of the episode, a “simple” home project is explained for the viewers. The projects seem “simple” enough, but the process is quite simplified to the point where I don’t think any novice sewist would ever be able to see the sample project and be able to construct the exact same thing. In one episode, it was explained how to make your own curtains. I laughed through the whole demonstration because they were running through the steps so fast.

But back to the competition. Unlike Project Runway, where contestants are usually given one daunting garment/outfit to construct in one or two days per round, these contestants go through 3 different tasks per round. The tasks increase in difficulty and it appears the judges take all three tasks into account when making their final decision of who to eliminate. Usually the first task involves a simple garment made from a provided pattern. The second task is a refashion and the third task is a more detailed garment they have to fit on a model. However, the contestants were apparently made aware of the third garment ahead of time so they could pick a pattern and theoretically practice before having to make it on the show.

8 contestants started the show and 2 contestants have been eliminated per round. Our dear Tilly was unfortunately bounced in the second episode. I think her downfall was being too ambitious, which is too bad because you gotta appreciate someone who really pushes themselves to excel.

I’m pretty sure my husband thought I was a total nerd for watching this show, but eventually he started watching it with me and he COULD NOT STOP TALKING  about Stuart’s vest. I had joked awhile ago that I should make him a vest like the one a character wears in the show ‘Justified’. He seemed to like the idea, but then he became totally smitten with Stuart’s vest and now he wants one NOW! Oh boy, what have I gotten myself into?

I can’t wait to watch the finale of TGBSB! And, yes, I would totally apply for the show if it was held in the States. My husband thinks I should apply for the show even if it’s held in England….um, I don’t think that would be allowed…..

Anyway, watch the show! It’s delightful! They have tea during their breaks! And they all have amazing accents! It’ll make you walk around the house saying “haberdashery” and wishing you could use it in everyday conversation with your non-sewing friends.

I just couldn’t resist any longer. Over the weekend I finally bought Ayumi’s book, ‘Patckwork, Please!‘.

{side note: my husband can’t stop saying it like this: “Patckwork? PUH-LEASE!” He’s also the guy who will always say, “I have Du-puis” when we watch a hockey game involving the Pittsburgh Penguins and the announcer mentions Pascal Dupuis. Also, he never fails to say, “I guess he’s just in a bit of a pickle” when we watch a game involving the San Jose Sharks and the announcer mentions Vlasic’s name. *sigh* he’s such a goofball, but aren’t we all 😉 }

We spent Saturday afternoon at The Grove and Farmer’s Market having lunch and picking up some goodies. There is a Barnes and Noble at The Grove so I insisted we stop by since I may have checked earlier in the week if the book was in stock (it was!). It took a bit longer than I anticipated to find the book because a sneaky stock person placed it in the knitting section instead of the sewing section so I had a moment of panic when I couldn’t find it. I felt so smart and victorious when I found the book.

I knew I needed to make a project from this book ASAP or else it would just sit on my bookshelf for weeks and months. The main reason I was hesitant to start on these projects is because I don’t think I have the “right” fabrics. I don’t have quite the fabric stash that most of the quilting blogging universe appears to have. I don’t have any quirky text prints or linens and most of the fabric I have runs on the darker side, but I made do with what I had. All of the fabric I used was purchased at Momen+.

I made one bell pepper coaster and one pincushion.

Pincushion Top

I have one small, itty bitty gripe with the book. I would have preferred if all the templates were positioned close to the book’s free edge. In some cases, the templates are closer to the bound edge and there is text closer to the free edge. Why couldn’t they have switched positions??? I don’t like “cracking” a book’s bind, it sorta pains me when I have to make creases in bound books. In this case I have to really open the book in order to make sure the template is copied correctly. Thankfully, most of the templates are drawn to scale so you don’t need to worry about magnifying the copies. However, I noticed one template needs to be copied at 133% magnification and my home printer doesn’t offer that magnification size, so I’ll have to go to a copier store.

Top of Coaster

I was too lazy to change the top-stitching thread to match the light fabric. I sorta like the contrast, although I would have liked it better if my top-stitching was even….whoops!

I have to admit that these two items took me way longer than I had anticipated. This was my first foray into paper piecing and I didn’t quite read through all of the instructions in the sample block. My points aren’t perfect, mainly because I think my grid ruler is a bit off, which caused my traced templates to be off in size. However, as Ayumi explains in the intro part, you shouldn’t have “perfect” projects when you start because improving your work is part of the fun of paper piecing. And she’s right! I’m excited to make more and improve my technique. After having completed these two items, especially the pincushion, I feel way more confident in tackling more paper pieced projects. I really want to try freezer paper piecing next.

Side View of Pincushion

The projects in this book are so freaking adorable. This book inspires me to collect fabric based on colors and scale of prints. I just found out a good friend of mine is expecting so I’m definitely going to whip up some bibs from this book. Now I just need to get my hands on more fabric….

Bailey turned 1 year old yesterday (in human years)! We adopted Bailey in late June 2012 from the LA Animal Shelter. I walked by every cage and while most kittens were sleeping or mewing incessantly, little Bailey was the only kitten who walked up to the front of the cage and even stood up on his hind legs. I knew immediately that he was the one meant for our little family.

Here is a side-by-side comparison of a photo taken about 1 week after we adopted him and another photo taken today.

Happy Birthday, Bailey

According to WiiFit (yes, this is how we weight ourselves), he went from 4 pounds to 12 pounds!! (He actually topped 13 pounds a month ago.) Bailey has grown considerably in the almost 9 months we’ve had him! I used to think it was adorable when he would splay across my neck while I was sleeping. Now, I can barely breathe when he does it. He also used to be tiny enough to sleep on an extra pillow behind my head, but not anymore 😦

Sometimes he has too much energy and he definitely knows how to push our buttons. He still likes to bite a lot, but thankfully he has never hissed at us. No matter how irritated we (mainly my husband) get at him, at the end of the day how could we ever stay mad at something this cute?

Completed Sewaholic Patterns Minoru Jacket!

Ahhhh, a finished object! I’m thrilled I finally finished something other than a skirt (especially since I can count on one hand the number of times I wore a skirt last year). I thought I was going to finish the Cambie dress first, but after buying fabric for the Minoru Jacket I couldn’t wait to get started on it. Here is what it looks like all zipped up:

Minoru Jacket

I have no idea why I’m making that expression. My dad has an uncanny ability to capture my best faces.

Here is a description of my sewing process and any alterations I made:
I opted not to make a muslin because (a) Sewaholic patterns are pretty close to my size without major alterations, (b) Lauren of Lladybird made one in a Size 0 without alterations and her posted measurements are close to mine, and (c) I am way too lazy to make a muslin. I cut a size 2 for all the pieces, but I did some major shortening to accommodate my height (I’m 4’11”). I shortened the front, back, and sleeve pieces approximately 3″. I wanted a jacket that would cover most, if not all, of my tush, but not extend too far past it. The hem unintentionally ended up being about 3″ because I accidentally cut the plackets too short, but the length turned out fine. But, I gotta admit that the entire time I was sewing, I kept praying the jacket would fit, especially in the shoulder/armhole area.

Minoru Jacket

Just long enough to cover my tush. My mom took this photo, which is why it’s posed a bit better.

I also used different zipper lengths to accommodate the shortening. The pattern called for a 28″ zipper in the front and an 18″ zipper for the collar. However, when I was shopping for zippers I held them in front of me and around my neck and the recommended sizes seemed so big on me. I decided that a 24″ zipper for the front was long enough and I went with a 14″ zipper for the collar, although at the time I was not exactly 100% sure how the shorter collar zipper would affect the construction of the collar and hood. Turns out using a smaller zipper is totally doable. I lined up the hood side seams with the length of the zipper, which means the hood is slightly gathered at the ends when you sew the hood to the collar. While I don’t think the shorter collar zipper is disastrous, I do think the hood would look better with an 18″ zipper length.

Minoru Jacket  Fully Hooded

You can see that the hood is slightly gathered at the end of the zipper due to using a shorter zipper length than what was recommended in the pattern. No biggie!

Even though I shortened the jacket length considerably, the 24″ zipper does not extend the full length of the jacket from the top of the collar to the bottom of the jacket. The top of the zipper is a couple inches below the top of the collar. When I was shopping for zippers I didn’t realize how high the collar would be, which is why I initially thought a 28″ zipper was way too long. If you want the zipper to extend all the way to the top of the collar, then you do want to use a 28″ long zipper, even if you’re short like me.

I read several reviews of this jacket before making it, which I highly recommend so you can get ideas and tips. I especially like the idea of including side seam pockets and lining the hood, although I’m not 100% thrilled with the placement or size of the pockets I added. (I’ll fix it next time!)

Another tip other sewists suggested was to line the inside of the collar because you can see the “inside” of the collar when you take the hood out. I kept that tip in mind and even cut an extra collar lining piece, but ended up not using it. The wrong side of my jacket fabric looks almost identical to the right side so I opted not to line the inside of the collar. Howevah, there is one thing I want to fix with the hood/collar, which is add bias binding to the hood/collar seam. When I take out the hood you can peek into the collar and see the unfinished seam. The fabric I used for lining frays a ridiculous amount and I’m sure it’ll get out of hand the more I wear the jacket.

As I mentioned above, I shortened the sleeves by about 3″. I was worried the sleeves would be too tight once I attached the lining so I ended up starting with a 5/8″ seam allowance at the armhole and, sorta quickly, transitioned down to a 3/8″ seam allowance for most of the sleeve. The extra 1/4″ of room definitely feels better. I added the cuff to the sleeve, but opted not to add the elastic in the cuff.

Here is a peek of the lining and of the one inside pocket that I sized to fit my phone.

Minoru Jacket Fully Lined

I have no idea what I’m doing in this photo. Again, my dad took this photo and he just kept snapping away while I kept squinting.

Materials:
Main Fabric: Organic Cotton Twill (Plum color, I think) from Mood. The fabric is supposed to be 60″ wide, but after washing it seemed to measure in at 50″.

Thread: In case you want to use the same color, I used Guterman thread color #445 and it blends right in.

Lining Fabric: Iridescent Maroon/Greenish Fabric from Mood (the tag was missing from this roll of fabric so I’m not quite sure what it is exactly. I searched online for it and everything in the “iridescent” search result is around $12-18/yard, but the guy rang it up as acetate for $3/yard. Either I got a great deal or I’m using total crap for the lining. All I know is, I loved the color and had to have it, but the fabric was a total pain to work with). Based on the photo online, it looks closest to this fabric in color, but I have a hard time believing that what I used was silk chiffon.  Here is a close-up photo of the fabric post-wash:

Cotton Twill+Lining

Zippers: 24″ separating and 14″ closed zippers Coats and Clark brand purchased at International Silks and Woolens

Hours to Make: A lot. I didn’t want to keep count because I didn’t want to get discouraged. I cut the main fabric one Saturday evening. The following day I finished steps 1-9 and cut the lining pieces. I probably did a solid 5-6 hours of sewing that day. All day I kept thinking I could have finished the jacket the same day if I had started early in the morning and didn’t take any breaks, but now I’m not so sure. I finished the rest of the jacket over the course of several evenings the following week.

I gotta say, even though this jacket took a lot of time, I LOVE IT! And the best part is I received a ton of compliments from my family when I showed them the jacket. I thought they were going to say, ‘oh that looks nice…[let’s talk about something else now]‘, but instead they were stunned! Seriously, people, Sewaholic Patterns are exceptional! They’ll make you feel like you belong on Project Runway. My dad was so excited he got his camera and insisted on taking photos (see above) AND I even made it onto his FB wall. Hahah! He rarely posts stuff, so I feel pretty special that he thought my jacket was worth posting about on FB (although he did post the one photo where I’m making a really goofy face, but I guess most of the photos he took are of me making a weird face). I really want to make another one, but this time without a hood.

And as a reward for finally finishing a pretty awesome garment, I treated myself to the Robson Trench Coat. Treat Yo’ Self 2013!!! I have visions of a polka dot trench coat…

I’m not the biggest fan of April Fools’ Jokes. However, this year I thought there were some good jokes done by big companies. A friend alerted me to Sony’s Animalia Line, which includes Kitty Headphones and Dog TVs.

Then later in the day a different friend shared REI’s April Fools’ Joke on Facebook:

REI April Fools Joke 2013

REI April Fools Joke 2013

AWWMIGOD! COULD THIS BE ANY CUTER?!!?!? I about died from cuteness overload. Here are a couple more items for your adventurous kitty:

REI April Fools Joke Kitty Tools

My Bailey could really use a tiny little machete! I had to take screenshots of the website just in case it gets taken down in the future, especially since the “deal” is only valid on 4/1/2013. Here’s the official announcement from the REI Facebook page:

REI April Fools Joke Facebook Page

I can’t stop cracking up when I look at that sweet little kitty in the ad. Oh man, how I wish it was possible to take my cat hiking….

Anyone else see any good April Fools’ jokes?

{Fabric Store} Momen+

Last weekend I stopped by Momen+ in Torrance, CA (located in the suburbs of LA County). It’s a cute little sewing/quilting shop filled with tons of fabric, patterns, notions, and tools and there is a small workspace area in the back where I think they hold classes. Since the owner has Japanese roots (I think), this shop carries lots of Japanese fabric, including the ever popular Kokka and Echino, but there is also plenty of “modern” fabric too.

Fabric at Momen+

Side Note #1: Funny story. My mom, who is from Japan, didn’t know about double gauze even though it originated in Japan. She looked a bit unimpressed with the “thin” fabric {her words}. I told her about the popularity of double gauze, but that didn’t seem to help the cause. $20/yard for double gauze? *gulp* Where’s the sale section?

Anyhoo, my mom has visited Momen+ a couple times and has been sweet enough to buy me some Japanese fabric (not the popular stuff, but super cute nonetheless) and a couple mini quilt block kits. Since I didn’t have any specific projects in mind I naturally spent what seemed like forever looking at every single bolt of fabric. I really didn’t want to buy something I could easily find at either Sew Modern or Sew LA or that I’ve seen online and could easily search for at Hawthorne Threads. At first I couldn’t decide if I wanted to buy fabric for a garment or for a quilt or small project. Lately I’ve been more hesitant to buy quilting cotton for garments and I didn’t want to spend the beaucoup bucks on Echino or double gauze, so by the process of elimination, I decided I was searching for fabric to add to my small fabric stash for a future quilt (or more likely, a super mini quilt).

While Momen+  {yelp review link} has a decent selection of fabric (including a couple clearance tables), the BEST part of Momen+ has to be their stock of bias binding and sewing tools. My jaw must have dropped when I saw this display case of bias binding and pre-made piping in all sorts of wonderful colors, sizes, and patterns. It’s so eye-catching!

Bias Tape and Piping

White and purple gingham bias binding? Linen bias binding? Yes, please! (Although I didn’t buy any…)

Day 82/365

Towards the back against the wall there were even more options (I seem to recall metallic bias binding too). All of these are from the brand Captain 88, made in Japan. Sure, you could always make your own bias binding (and I think most of us do for quilts), but when I finally get my grubby paws on the Robson Trench Coat Pattern, you bet your butt I’m going to buy some ultra cute bias binding, even if I have to buy several packs at $3-$6 per pop. Also, I’ve been wanting to make a new pillow cover and bind it in piping, but the thought of making my own piping really bores me. Now I know where to get piping! (yes, I’m that lazy!)

One of the best items my mom bought me (yes, my mom still spoils me because she doesn’t have any grandkids) is a Karisma mechanical pencil for fabric. (I searched online and found it available on Superbuzzy, in case you want one, yes you do, trust me.) While I was looking at every single piece of fabric, for some reason my mom was looking at the sewing tools picking out things she thought I needed (even though I didn’t mention needing anything). However, I really did need a new chalk pencil because the pencil I normally use always breaks and never marks very well and my pencil sharpener sucks so I never have a fine point.

Second side note: I swear my mom can read my mind. There have been numerous occasions throughout my life where I’ll be thinking about needing something and then all of a sudden my mom will have bought it for me without even talking to me about it. Mom, get out of my head! No, wait, stay there! I like receiving unexpected gifts.

Anyway, when we were checking out the saleslady mentioned this pencil is really good so my mom bought one for herself too. This lady wasn’t kidding. This pencil is amazing! It’s a bit pricey at $10, but it comes with a refill cartridge and when you run out of lead you only have to buy another refill pack. I’ve only used the white lead on a dark fabric and it works like a charm. This is the only photo I’ve taken of it. The photo is crappy, but look, I can write legible words on fabric!

Day 83/365

There was also some other stuff in the store including needlework patterns, mini quilt block kits, some felt kits (according to my mom these felt things are apparently all the rage in Japan right now), Japanese quilting magazines (although no awesome Japanese patchwork books (BOO! and I looked through every single book on the bookshelf)), and laminated fabric. I’m sure I’m missing some other stuff, but you probably get the idea.

After all the time I spent looking at fabric I only ended up getting half a yard each of these two prints.

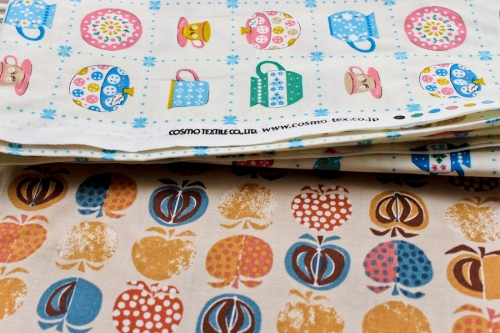
Momen+ Fabric Haul

I think they’ll go well with some fabric I currently have, but who knows what I’ll make and when I’ll get around to using them. But at least I have them.

Unfortunately for those out of the area Momen+ does not have an online store. But, if you live nearby, then definitely take a trip over to Momen+. I don’t know of any other shop in the area with this type of selection so I think it’s important to spread the word about this fantastic shop. My mom told me that I’m only allowed to go if I also stop by to see her. Lucky for my mom the shop is located just a bit too far from me to warrant frequent trips, so my mom doesn’t have to worry about me ignoring her.